Today, June 28, is Tau Day! How fitting!!!
In case you don't know the reference, here's an >>article<< on it.
Tau'va, my friends!!!

Tuesday, June 28, 2011
Downtime
Sorry for the lack of updates. Had a lot of shennanigans going on. Anyway, I've scrubbed 6 more Fire warriors clean as well as a Broadside and prepped them for painting. Didn't really have a whole lot of time to sit and concentrate on painting camo patterns, so I thought I would do something a little less mind numbing.
I'll finish the Crisis 'suit, start these other models, and update. It might be another week or so before I give a truly meaningful post... but I sure hope not! I need to paint!!!!
Life beckons. Be safe and keep the loved ones close.
I'll finish the Crisis 'suit, start these other models, and update. It might be another week or so before I give a truly meaningful post... but I sure hope not! I need to paint!!!!
Life beckons. Be safe and keep the loved ones close.
Monday, June 20, 2011
Crisis: Continued
Well, I've been taking it easy this past week, so I haven't done much. Spending time with my wife and daughter has given me a nice break.
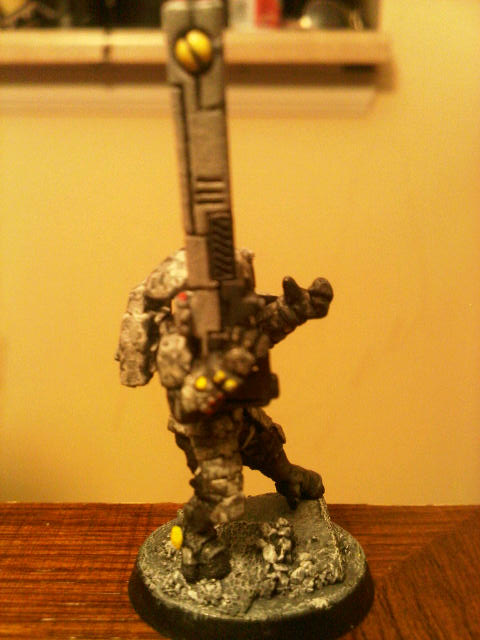
What I have done is map out my color scheme on the crisis suit I started.

It gives a good idea of where I am headed with it. The most notable thing I want to point out is that I blacked-out the outer portions of the torso. I think it takes away the boxy look and makes it look more agile and threatening.

Again. I'll add more pics as I finish the camouflage.
What I have done is map out my color scheme on the crisis suit I started.


Wednesday, June 15, 2011
Starting the First Crisis Suit
Well, I felt it time to start on a one of the Crisis Battlesuits to change things up and finally see what one would look like under my paint scheme.
The first thing that I've done differently than the other models from my friend's army, is that I didn't strip the paint off this model. It was mostly still black, so I decided to just go along with it as if that were my base coat.
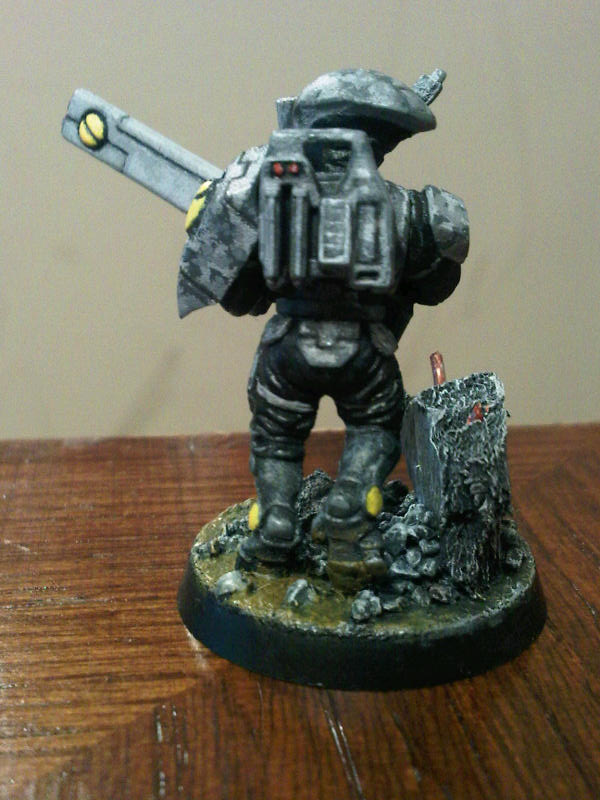
I decided to go with a cross between the Fire Warrior and vehicle paint schemes I had already outlined. The overall look of the Fire warrior is the primary aspect I want to go for... black base, with dark "boots," digital camouflage armor, yellow markings, and red lenses/lights/etc. But, the battlesuits are a median of sorts between the infantry and the vehicles, so I wanted to carry over something from what I had outlined on the devilfish as well. As you can see in earlier pictures on this blog, the plates down the center of the vehicle forgo the digi-camo treatment for a solid color. I decided this would be the perfect element to bring over for the Crisis 'suits. I also decided to use the color surrounding the Devilfish's engine intake on the 'suits as well.
Time for some visual conformation of what I am doing. Here is a picture of what I started last night.

As you can see, I am working my way up the battlesuit from its feet. I styled it just like the Fire Warrior. You can also see where I outlined the chest with the solid color application down the center. Once the digital pattern surrounds it, I believe it will be a good transition between the Fire Warriors and the Tau vehicles in my cadre.
I will report back when I've finished the Battlesuit and upload some pics as well!
The first thing that I've done differently than the other models from my friend's army, is that I didn't strip the paint off this model. It was mostly still black, so I decided to just go along with it as if that were my base coat.
I decided to go with a cross between the Fire Warrior and vehicle paint schemes I had already outlined. The overall look of the Fire warrior is the primary aspect I want to go for... black base, with dark "boots," digital camouflage armor, yellow markings, and red lenses/lights/etc. But, the battlesuits are a median of sorts between the infantry and the vehicles, so I wanted to carry over something from what I had outlined on the devilfish as well. As you can see in earlier pictures on this blog, the plates down the center of the vehicle forgo the digi-camo treatment for a solid color. I decided this would be the perfect element to bring over for the Crisis 'suits. I also decided to use the color surrounding the Devilfish's engine intake on the 'suits as well.
Time for some visual conformation of what I am doing. Here is a picture of what I started last night.

As you can see, I am working my way up the battlesuit from its feet. I styled it just like the Fire Warrior. You can also see where I outlined the chest with the solid color application down the center. Once the digital pattern surrounds it, I believe it will be a good transition between the Fire Warriors and the Tau vehicles in my cadre.
I will report back when I've finished the Battlesuit and upload some pics as well!
Thursday, June 9, 2011
Five for Fighting
I’m now up to five Fire Warriors.

If you are wondering why it’s taking me so long to get through these guys, it is because it takes me a few hours to do each of them. That may seem crazy, but I like to take my time with such things. Patience IS a virtue you know!
As you can see, the new guy is walking through the mud past a broken wall.


I think it might be time to add some guys with pulse carbines. What say you?


Wednesday, June 8, 2011
3rd Base


The Fourth Horseman
I finished the fourth Fire Warrior. Here he is:

 He found a slab to perch on, apparently.


Saturday, June 4, 2011
The Three Amigos
So, I went ahead and added the antennas to the helmets and have the three Fire Warriors I have completed thus far ready for combat.Take a look!


As you can also tell, I updated the bases on the first two to match the third.
Like always, comments and questions are welcome!


As you can also tell, I updated the bases on the first two to match the third.
Like always, comments and questions are welcome!
Thursday, June 2, 2011
Three's Company...
Well, I mentioned that I put a Fire Warrior on that first base I made. Well, here's the first baseman (Ha! A baseball joke! ...And I don't even like baseball. :\ ).

A dynamic fellow indeed. He's weighted on his back foot, looking up the top's of the surrounding buildings... or what's left of them. His gun may be in a non-active position, but that left hand is definitely reaching to meet it or at the very least is ready to support it if the need to return fire arises.


If you're wondering where the antenna normally on the right-hand side of his helmet is... well, its not on yet as I need to add it. I want to get everything else finished on each fire warrior before I pull the antenna off the sprue, as they are easily lost otherwise.
****
This guy is going to hold a special significance for me. Why? Well, he is the first 40K model that is entirely my own. I bought the box, cut him from the sprue, carved the materials for his base, glued him together, and painted it all. It's original me.
I am forever grateful to my friend for sending me his Tau models to get me started (and I have many more of them yet to paint). Those models hold a different meaning for me. One that exemplifies friendship and comradery.
But, this model is the first in something unique. The first of my personal creations. When it is all said and done, I can say this is where I stood on my own and started the journey.
ALL YOUR BASE ARE BELONG TO US!!!!
So, I wanted to start working with some of my own stuff now that I've gotten started. I bought a box of Fire Warriors and promptly opened them to start planning out what poses I wanted to assemble them in. Upon lifting the side of the box, the first thing there were the round bases. Then, it hit me... I knew at once that the first thing I could do to make these guys completely my own would be to make unique bases.
I went to the hobby store and immediately bought some foam board and other hobby supplies and tools. I came back and started cutting the foam board with my hobby knife and whittling it down. I glued the pieces down and added ballast from the two kinds I had. Once dried, I coated the whoe thing with Adeptus Battlegrey foundation paint from Games Workshop. I then added a Badab Black wash. After it set in I then dry brushed a layer of Codex Grey, followed by highlighting layers of Fortress Grey and Skull White.
What came about was this:

Pretty good for my first base, wouldn't you say? I think so. I was so proud of it, that I didn't even want to add a figure to it at first. I eventually added a Fire Warrior, but that's for another post.
I was so pleased with this base, that I made another to test my rubble skills. Here is the second base (*needs a baseball joke here*)

A nice slab if I do say so myself.
One thing is for certain, I will be expanding on these ideas for my Urban Cadre as they provide good bases thematically. Plan to see more types of urban ruins in my bases in the future.
Subscribe to:
Posts (Atom)