Wednesday, June 8, 2011

3rd Base

Here are pics of the next base I made.  I added some rusted rebar in a broken wall and mud on the ground to make it different from the others.


So, do you like it? Is it too different from the rest? A welcome differentiation? Let me know.

The Fourth Horseman

I finished the fourth Fire Warrior.  Here he is:


He found a slab to perch on, apparently.

Saturday, June 4, 2011

The Three Amigos

So, I went ahead and added the antennas to the helmets and have the three Fire Warriors I have completed thus far ready for combat.Take a look!


As you can also tell, I updated the bases on the first two to match the third.

Like always, comments and questions are welcome!

Thursday, June 2, 2011

Three's Company...

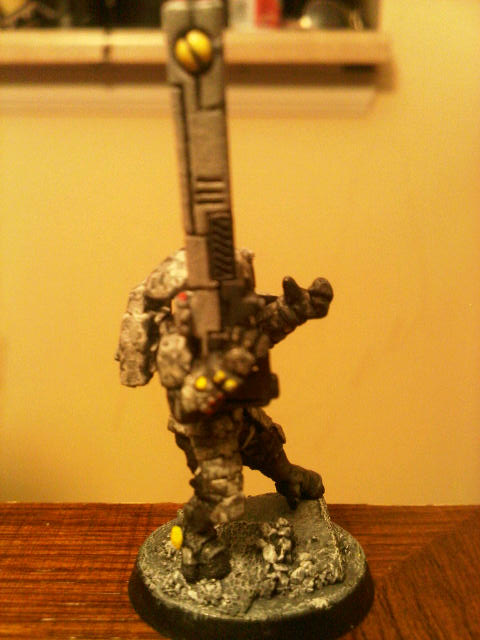
Well, I mentioned that I put a Fire Warrior on that first base I made. Well, here's the first baseman (Ha! A baseball joke! ...And I don't even like baseball. :\ ).


A dynamic fellow indeed.  He's weighted on his back foot, looking up the top's of the surrounding buildings... or what's left of them.  His gun may be in a non-active position, but that left hand is definitely reaching to meet it or at the very least is ready to support it if the need to return fire arises.


If you're wondering where the antenna normally on the right-hand side of his helmet is... well, its not on yet as I need to add it.  I want to get everything else finished on each fire warrior before I pull the antenna off the sprue, as they are easily lost otherwise.

****

This guy is going to hold a special significance for me.  Why?  Well, he is the first 40K model that is entirely my own.  I bought the box, cut him from the sprue, carved the materials for his base, glued him together, and painted it all.  It's original me. 

I am forever grateful to my friend for sending me his Tau models to get me started (and I have many more of them yet to paint).  Those models hold a different meaning for me.  One that exemplifies friendship and comradery.

But, this model is the first in something unique. The first of my personal creations.  When it is all said and done, I can say this is where I stood on my own and started the journey.

ALL YOUR BASE ARE BELONG TO US!!!!

So, I wanted to start working with some of my own stuff now that I've gotten started.  I bought a box of Fire Warriors and promptly opened them to start planning out what poses I wanted to assemble them in.  Upon lifting the side of the box, the first thing there were the round bases. Then, it hit me...  I knew at once that the first thing I could do to make these guys completely my own would be to make unique bases. 

I went to the hobby store and immediately bought some foam board and other hobby supplies and tools.  I came back and started cutting the foam board with my hobby knife and whittling it down.  I glued the pieces down and added ballast from the two kinds I had.  Once dried, I coated the whoe thing with Adeptus Battlegrey foundation paint from Games Workshop. I then added a Badab Black wash.  After it set in I then dry brushed a layer of Codex Grey, followed by highlighting layers of Fortress Grey and Skull White.

What came about was this:


Pretty good for my first base, wouldn't you say?  I think so.  I was so proud of it, that I didn't even want to add a figure to it at first.  I eventually added a Fire Warrior, but that's for another post.

I was so pleased with this base, that I made another to test my rubble skills.  Here is the second base (*needs a baseball joke here*)


A nice slab if I do say so myself. 

One thing is for certain, I will be expanding on these ideas for my Urban Cadre as they provide good bases thematically.  Plan to see more types of urban ruins in my bases in the future.

Sunday, May 29, 2011

That's Not A Knife...

Well, the other Fire Warrior from my friend's collection that still remained intact with all of its gear was screaming at me to be painted.  So, to take a break from the painstaking monotony that is the digi-camo on the 'fish, I obliged.

The Fire Warrior in question was obviously what my friend had intended as the leader of the Fire Warrior team - what with his Bonding Knife and all.  So I thought it would be neat to bring his experience to the table (pun definitely intended).  He definitely fits the part, braving battle without a helmet!!!


The thing I really wanted to do with a team leader was make it distinct from the rest of its kin.  Fortunately, my friend already beat me to the punch.  He had built this guy with the helmet-less visage of a Tau warrior, which, to be honest, is nothing spectacular in an of itself... I mean... it is an option provided straight out of the box.  But, what was unique was that he had taken a helmet and placed it underneath the warrior's backpack as if it was hanging there ready to be grabbed and slid on his head.  I love this little added detail my amigo placed. and wanted to add to the figure's uniqueness.


I added to the models distinction by adding colored areas to its armor to give the illusion of pulling rank.  This guy is a leader and everyone should see it, right?  Since this army'sdistinctive color is yellow, I added yellow to the shield on the left shoulder, and on the visor on the helmet.


I also went ahead and based this guy and his unit buddy I painted back a year ago.


To base them, I used Fine Cinders ballast from Woodland Scenics for the dark, bare ground and Course Gray ballast for the rocks/rubble.  I am definitely going to expand on the basing techniques, but these guys were already o bases and I didn't want to remove them.  I bought a box of fire warriors recently, and I'll have some more detailed bases with what looks like city rubble... afterall, this is an urban Tau cadre.


Well, that's it for now.  Questions? Comments?  Leave them below!!!

Wednesday, May 25, 2011

Devilfish, Part Tertius, -a, -um

AS you can see from the previous post, I did some work on the 'fish this past weekend.  I've almost entirely finished one side of the transport.

Here are some details:


 I finished the work on theingine nacelles and even added the operational wear and weathering.

An overview of the body and one of the drones.


Now you can see the details and weathering up-close and personal.

So, what do you guys think?  Leave comments. More updates to come!!!!